Next we opened some clips of Norman McClaren films in Quicktime, a video playback program which allows the user to advance the frames one at a time using the keyboard arrow keys. By leaving Aaron in control of the films motion, he could see how the process worked. The movement was decomposed into the individual frames. It’s kind of like revealing the magician’s magic trick. Aaron really likes Norman McClaren's work, which I think is great. A lot of kids I know get bored of anything that doesn't have the kind fast-action storytelling Disney has accustomed them to. Aaron was quite content sitting through these stick drawing animations that lost their novelty appeal decades ago.
 His favorite was La Merle (The Blackbird).
He found it halarious when the beak of the bird pecks around at the pile of white lines, picks them up one by one with his beak to put together the rest of his body then does a little victory dance.
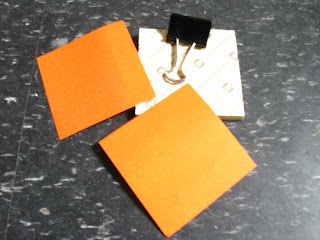
The last activity was the flip book. Making a flip book is quite easy thanks to everyone’s favourite versatile office tool, the Note Pad.

 Just take a full Note Pad. Peel off a section if you want to reduce the number of pages. Set them aside to use later for writing passive aggressive notes to house mates.
Use the Stick Pad as an outline to trace two covers onto thin board and cut them out to create the front and back cover.
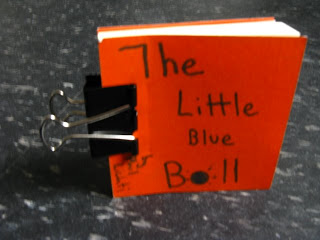
Put a binder clip on to hold together the sticky spine.
Plan the action in advance. If an object will follow a fixed line of motion, you can trace on the outer spine a line to guide vertical movement so each page has a tiny mark.
Begin with the final frame (the last page of the flip book), draw your first element using a pencil first, then trace with a dark marker. When you turn the page, you should be able to see your last drawing through the page. The next 'frame' will be have some minor change or movement. For example, the ball in the example above would move 4 centimetres down and then the next frame 4 centimetres further. The goal is to create a fluid movement, so the changes to make as you turn each page should be at consistent distances.
For more simple animations crafts that can be done at home, check out these activities: The Thaumatrope & The Zoetrope
So finally, without further ado, to start off the show here is a sample flipbook I made in preparation for the workshop entitled: 'The Little Blue Ball' followed by Aaron's flipbook masterpiece: 'The Little Shapes'.

Aucun commentaire:
Enregistrer un commentaire